Creating a tapered extrude
|
Command |
Path |
Shortcut |
|
Tapered Extrude |
Model |
Ctrl+Alt+U (Windows) Cmd+Option+U (Mac) |
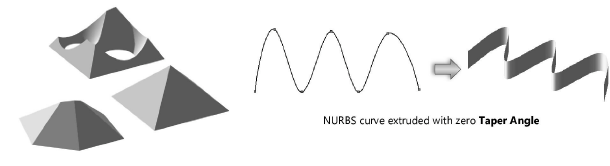
A tapered extrude can be created from 2D objects, 3D polygons, and NURBS curves, circles, and arcs.
To easily create wavy extrusions, enter a taper value of zero. The command also extrudes 2D objects into 3D objects with a defined taper. Use it to convert a single object or several objects at the same time. Once the extrude is created, you can edit the height and taper from the Object Info palette.
Use the Reshape tool to edit the height of the tapered extrude interactively. See Reshaping extruded objects and solid primitives for more information.
To create a tapered extrude:
Select the object to turn into a tapered extrude.
Select the command.
The Create Tapered Extrude dialog box opens.
Enter the Height (Z) of the extrude and the Taper Angle. A positive taper degree shrinks the object as it extrudes, while a negative taper degree widens the object.
Set a Taper Angle of 0 to create an extrusion with no taper.
If a tapered extrude fails, the object reverts to the last known “good” value.
